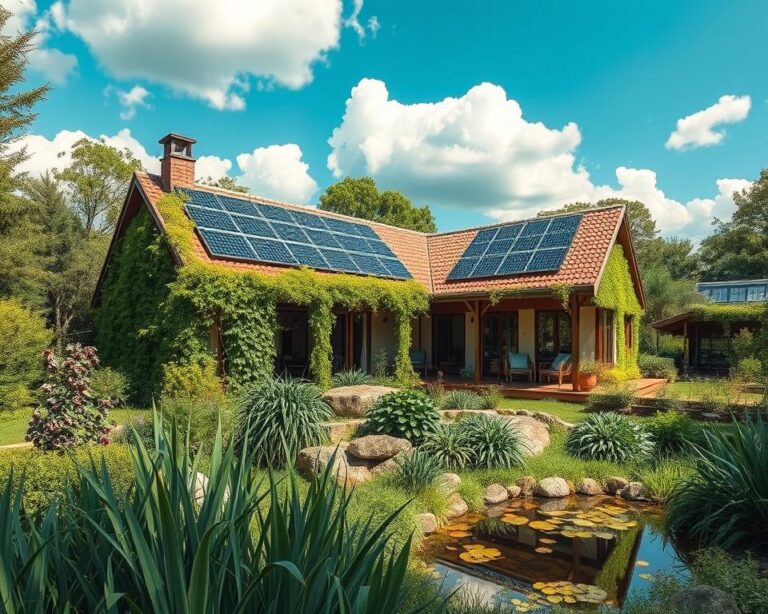
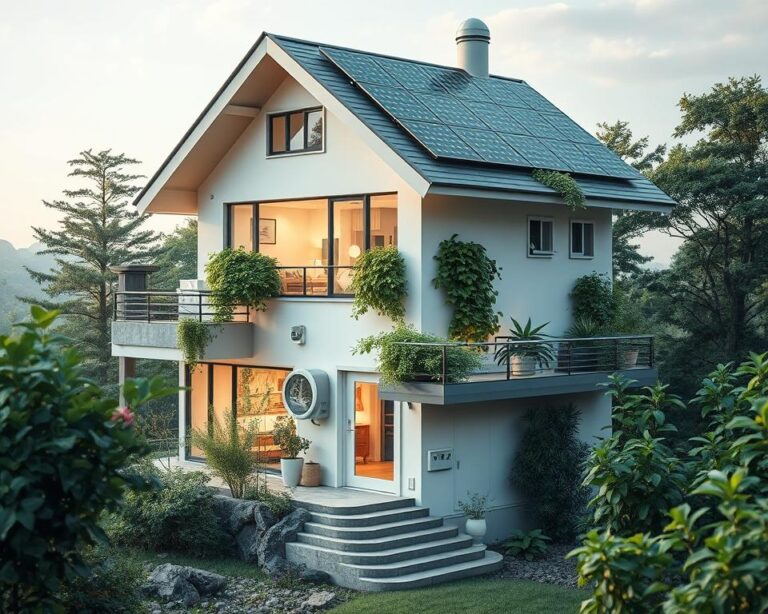
The guide opens with a clear promise: practical, cost-effective low energy home improvements that raise comfort, cut utility bills, and boost property value for homeowners across the United States. It frames energy-saving home improvements as a mix of simple do-it-yourself fixes and larger sustainable home upgrades like solar arrays, with options suitable for renters who get landlord approval and for contractors advising clients.
Readers will find how-to advice on prioritizing projects and realistic outcomes. Typical measures like improved insulation or switching to Energy Star appliances often cut heating, cooling, or overall electricity use by about 10–30%. This depends on the choice and installation quality. The piece also discusses basic payback timelines, helping decide which upgrades to start first.
The article lays out a clear plan. Foundation steps like sealing, insulation, and window upgrades come first. Then it suggests technology upgrades such as Energy Star appliances and smart controls. It also highlights renewable options including rooftop solar and small wind. Plus, it mentions water-efficiency, sustainable landscaping, passive design, and available incentives. This structure assists homeowners and contractors in planning a step-by-step path to energy-efficient and green home improvements that deliver real savings.
Key Takeaways
- Low energy home improvements range from low-cost DIY fixes to larger investments like solar panels.
- Energy-saving home improvements can cut energy use typically by 10–30% when done correctly.
- Sustainable home upgrades increase comfort, lower bills, and often raise resale value.
- Prioritize sealing and insulation first, then move to appliances and smart systems.
- Understand payback timelines and local incentives before committing to major projects.
Understanding Low Energy Home Improvements
Low energy home improvements help a house use less power. They avoid relying too much on fossil fuels. Examples include better insulation, energy-saving heat pumps, and solar panels. Homeowners can track their energy saving progress with tools like kWh reductions and the HERS index. ENERGY STAR and the U.S. Department of Energy provide tools to check these savings.
Start by sealing your house better, then update your heating, cooling, and appliances. After reducing energy use, consider adding renewable energy sources. This approach saves money at the start and makes future updates work better.
What Constitutes Low Energy Home Improvements?
Important changes include better insulation, sealing leaks, and installing efficient windows and doors. Updated HVAC and water heaters lower energy use. Also, choosing ENERGY STAR appliances and LED lights saves energy. Smart thermostats help by cutting unnecessary use.
Adding water-saving taps and solar panels completes the energy-saving setup. These changes aim to use less energy and choose cleaner energy sources. Many local programs offer rebates and help to check if savings goals are met.
Benefits Beyond Energy Savings
There’s more to gain than just lower energy bills. Good insulation improves comfort and air quality inside. It also prevents mold by keeping moisture away, which is better for health.
Eco-friendly homes are more attractive to buyers, raising their market value. Using efficient appliances reduces repair costs too.
These updates also decrease harmful emissions and water use. They match local environmental standards, helping with bigger green goals.
Energy-Efficient Insulation Solutions
Upgrading your home’s insulation is a top way to make it more energy-efficient. This helps keep heating and cooling needs lower by slowing heat movement through your home’s structure. To get the best results, combine it with air sealing and proper ventilation.
Types of Insulation Materials
Fiberglass batts and rolls are popular and budget-friendly choices for walls and attics. They come in different thicknesses and densities, which means they can be used in a variety of project types.
Blown-in cellulose is made from recycled paper and works best for covering odd spaces or gaps, especially in attics. It’s perfect for projects that need filling in hard-to-reach places.
Spray polyurethane foam can be either open-cell or closed-cell, with both types providing excellent insulation and air sealing. Although pricier, closed-cell foam also prevents moisture and strengthens structures.
Mineral wool, or rock wool, offers benefits like fire resistance, noise reduction, and resistance to moisture. These features add to your home’s safety and comfort.
Rigid foam boards like polyiso, XPS, and EPS are great for outside walls, basements, and under floors. They help prevent heat loss if installed correctly.
For those interested in green living, materials like sheep’s wool and recycled denim are eco-friendly options. They work well for certain uses and lessen environmental harm.
Benefits of Proper Insulation
With the right insulation, you can save a lot on energy bills, sometimes cutting costs by 10-20%. The starting condition of your attic plays a big role in this.
Insulation makes your home more comfortable by getting rid of cold areas and keeping temperature steady. It also means your heating and cooling systems work less hard, which can save you money on repairs.
Some insulations can also make your home quieter and safer from fires, improving how comfortable it is to live in. Choosing greener insulation leads to less energy use and pollution.
Picking the correct R-value for your insulation is important. The U.S. Department of Energy and local rules provide guidance based on your climate. Tools and experts like Owens Corning and CertainTeed can help you choose and plan your insulation project.
How well your insulation is installed matters a lot for its effectiveness. Poor installation can lead to gaps, squeezing, and heat escaping. It’s also crucial to manage air leaks and moisture to enjoy all the benefits of upgrading your home’s insulation.
Upgrading to Energy Star Appliances
Appliances like refrigerators, washers, dryers, dishwashers, and HVAC systems use a lot of home energy and water. Picking efficient models lowers your bills and helps with other eco-friendly home upgrades. Many homeowners who want a greener home compare costs over an appliance’s life and the savings they’ll see.
What Are Energy Star Ratings?
ENERGY STAR is a program by the U.S. Environmental Protection Agency. It gives labels to products that meet tough energy-saving requirements. These labels show how the product performs and compare its energy use and cost to regular items. ENERGY STAR fridges and washers can save 10–50% more energy or water than older ones.
Efficient heat pump water heaters and HVAC systems reduce the use of fossil fuels and the need for electricity. Brands like Whirlpool, LG, Samsung, and Rheem have ENERGY STAR-rated products for your home.
Financial Incentives for Energy Star Products
Some high-efficiency products can get federal tax credits; always check the latest IRS rules before you buy. Local rebates from companies like Pacific Gas & Electric and National Grid can also help pay for these products.
Stores like Home Depot, Lowe’s, and Best Buy sometimes offer discounts and promotions. Doing a simple cost analysis can show how long it will take for your savings to cover the cost.
Choosing the right size and getting a professional installation are key for HVAC and water heaters to work best. Adding Energy Star appliances to your home’s energy upgrades makes each replacement more worthwhile.
Smart Home Technologies for Energy Management
Smart gadgets provide control and information for daily systems, making it easy for families to manage energy. These devices work alongside traditional improvements, boosting their effectiveness. Homeowners can monitor energy use, schedule activities, and rely on automation for regular decisions.

Smart thermostats reduce unnecessary heating and cooling using patterns or sensors. Brands like Google Nest, Ecobee, and Honeywell have adaptive scheduling and remote control via apps. The U.S. Department of Energy and maker studies show savings of 8–15% in heating and 10% in cooling with proper use.
Installing these thermostats is often easy with modern HVAC systems. However, some need a common (C) wire or an HVAC technician’s help. They also participate in programs that adjust demand, and give reports to help in making homes more energy efficient.
Smart lighting pairs LEDs with controls, substantially reducing energy use. Tech like Philips Hue and LIFX uses schedules, sensing, and daylight adjustments for savings. Smart switches and dimmers further cut energy and make bulbs last longer.
Lights adjust automatically to time and presence, avoiding waste when no one is there. They work with voice assistants and whole-home setups, offering modes that cut power when away.
Whole-home energy monitors, such as Sense and Emporia, provide detailed energy use data. They work with solar and batteries to manage energy better. Utilities sometimes offer rebates for these smart devices that help with energy peak times.
| Technology | Key Features | Typical Energy Impact | Brands/Examples |
|---|---|---|---|
| Smart Thermostats | Adaptive schedules, geofencing, remote access, demand-response | 8–15% heating, ~10% cooling | Google Nest, Ecobee, Honeywell |
| Smart Lighting | LED integration, occupancy sensors, scheduling, dimming | Up to 75–90% vs. incandescent | Philips Hue, LIFX, smart switches |
| Home Energy Monitors | Circuit-level data, alerts, solar/battery integration | Improves targeting of low energy home improvements | Sense, Emporia |
| Whole-Home Systems | Central control, automation, utility program integration | Optimizes overall smart home energy management | Smart hubs, home automation platforms |
Choosing Renewable Energy Options
Homeowners start by reducing energy needs through improvements in their homes. Next, they consider producing their own energy. This can mean adding renewable energy sources. For example, solar panels or wind turbines at home. These choices not only keep homes powered during outages but also reduce carbon emissions. By using batteries and smart tech, these systems become even more efficient.
Solar Panels: An Overview
Solar panels turn sunlight into electricity. A typical home solar setup is between 4 kW and 10 kW, fitting different home and roof sizes. The amount of power generated yearly depends on many factors, like the system’s size and the sun’s path.
Solar systems have several key parts. These include the solar panels (either monocrystalline or polycrystalline), an inverter (which could be a string inverter or microinverters), mounting setups, and sometimes a battery for storage, such as a Tesla Powerwall. In the U.S., these systems generally produce between 1,200 and 1,800 kWh per year for every kW they can produce.
The cost of solar panels can be offset by various incentives. The Federal Investment Tax Credit and state rebates help lower the initial expense. How quickly you get your money back—usually between five and twelve years—depends on local incentives and net metering policies. Using certified installers and checking your roof beforehand are smart moves.
Wind Turbines for Residential Use
Small wind turbines are an option for lots with steady winds. Residential turbines usually range from 1 kW to 10 kW. They’re most effective in areas with average wind speeds of at least 9 mph.
There are different types of turbines: horizontal-axis and vertical-axis. The success of a turbine also hinges on its location and local laws. This includes how tall it can be and how far it must be from neighboring properties. Tools like NREL’s wind maps and feasibility studies can help decide if wind energy is right for your home.
In the U.S., solar power tends to be a more popular choice than wind. Yet, combining wind turbines with solar panels and batteries can provide steadier power supply. Systems that manage energy use and inverters are key for making the most of this setup. Some areas even allow homes to contribute power back to the community grid.
| Aspect | Solar Panels (Residential) | Small Wind Turbines |
|---|---|---|
| Typical Size | 4–10 kW | 1–10 kW |
| Best Sites | Unshaded, south-facing roofs | Open rural lots with steady winds |
| Annual Output | ~1,200–1,800 kWh per kW | Highly site-specific; depends on wind speed |
| Common Components | PV modules, inverter, racking, batteries | Turbine, tower, controller, batteries |
| Permitting | Building permits, interconnection | Tower permits, zoning, setback reviews |
| Cost-Effectiveness | Widely cost-effective in many markets | Cost-effective only in suitable wind zones |
| Role in Strategy | Primary choice for many sustainable home upgrades | Complementary option where wind resource supports it |
Water Efficiency Improvements
Water efficiency is crucial for saving energy at home. Heating water eats up a big chunk of household energy. By using hot water wisely, we can lower our bills and carbon footprint. Small changes lead to steady savings and support eco-friendly home updates.
Low-Flow Fixtures and Their Benefits
Low-flow fixtures like showerheads, faucets, and dual-flush toilets cut down water use without sacrificing performance. Newer low-flow showerheads use 1.5–2.0 gallons per minute, less than the older 2.5+ gpm models. Choosing WaterSense-labeled options meets EPA standards and reduces indoor water use.
Using less hot water means saving more energy. Homeowners can figure out their savings by checking how many gallons they save and the efficiency of their water heater. This also means lower bills, fewer sewer fees, and less pressure on city water supplies.
Rainwater Harvesting Systems
Rainwater harvesting collects rain from roofs to use in gardens and toilets. It involves gutters, filters, tanks, and pumps. When set up right, it can feed drip irrigation systems and smart controllers, increasing water and energy savings.
Collecting rain reduces the need for tap water in yards and gardens. In places with high water costs or limits, saved rain can lead to real savings. Remember to check local rules on rainwater systems.
Other tips for saving water and energy include insulating pipes, switching to tankless water heaters, and considering heat pump heaters. To find out about grants and rebates for these upgrades, check local programs like those from the City of Toronto at city environmental grants and rebates.
Sustainable Landscaping Practices
Landscaping can lower cooling costs, control runoff, and increase biodiversity when we focus on water and energy. By choosing plants carefully and planning the layout, we can reduce the need for watering and cut down on fuel use for upkeep. These methods are part of bigger eco-friendly home improvements, helping make homes more energy-efficient throughout the year.
Xeriscaping: The Low-Water Landscape
Xeriscaping uses drought-resistant plants, efficient watering, and proper soil management to minimize outdoor water use. By adopting drip irrigation, applying mulch, and grouping plants based on their water needs, homeowners drastically cut their outdoor water consumption. They also spend less on gas-powered lawn equipment, saving energy and money.
When designing a xeriscape, start by assessing the sunlight, slope, and soil. Improve the soil if needed, group plants by their water requirements, and keep grassy areas for recreational use only. Placing a deciduous tree to the west can cool your home in summer and welcome sunlight in winter.
Benefits of Native Plants
Native plants naturally fit with the local climate and soil, needing less water and fertilizer. This makes them cheaper and less harmful to the environment. They also help local wildlife like bees, butterflies, and birds, making the ecosystem stronger.
What plants work best depends on where you live. Sages and agaves are great for the Southwest, while switchgrass and coneflower are good choices in many Southeast areas. For advice tailored to your location, check with local Cooperative Extension offices, the Xerces Society, or native plant nurseries.
| Practice | Primary Benefit | Impact on Costs |
|---|---|---|
| Xeriscaping (drought-tolerant plants) | Reduces irrigation needs and water waste | Lower water bills and less lawn care spending |
| Native plantings | Supports pollinators and reduces inputs | Fewer fertilizer and maintenance costs |
| Drip irrigation and mulching | Delivers water efficiently and retains moisture | Reduced irrigation frequency and pump energy |
| Permeable paving and rain gardens | Improves stormwater absorption and reduces runoff | Lower drainage fees and erosion repair costs |
| Deciduous shade trees | Provides summer shade, winter sun, and wind buffering | Reduces cooling and heating energy needs |
Enhancing Windows and Doors for Efficiency
Upgrading your windows and doors can cut heat loss, making your home more comfy. It also lowers your energy bills. People who improve their home to use less energy often get their money back sooner by starting with their windows and doors. Choices include simple fixes to replacing windows completely.

Energy-Efficient Window Options
Windows with double or triple layers and special coatings keep heat in. They can be filled with gases like argon or krypton to stop heat from escaping. And they don’t change how your windows look.
The type of frame you choose is important too. Options like vinyl, fiberglass, wood-clad, and aluminum with thermal breaks balance cost and how long they last. It’s good to compare their U-factor and SHGC numbers to find what works best for your weather.
Windows that are ENERGY STAR certified are designed for different zones. They are better than single-layer windows for comfort and saving money over time. Choosing these windows might also get you local rebates.
Importance of Proper Sealing
If air leaks around your windows, it can make good insulation pointless. Using weatherstripping, caulking, and installing them right can cut down on drafts and make your home nicer to live in.
Sealing doors is just as key. Changing or adding insulation to outside doors, putting in door-seal strips, and adding extra doors for protection helps keep your home warm. It also makes your heating and cooling system work less hard.
Keeping the air from leaking at different parts of your house, like where the roof meets the walls, is vital. This stops heat from escaping and keeps moisture out. Using certified people to install things and proper sealing materials means everything works as it should for a long time.
| Measure | Typical Cost Range (USD) | Primary Benefit | When to Choose |
|---|---|---|---|
| Weatherstripping & caulk | $50–$300 | Reduces drafts, low upfront cost | Drafty frames, tight budget, first step |
| Storm windows / retrofit films | $200–$1,200 | Improves insulation of existing windows | Historic homes, temporary improvement |
| High-performance replacement windows | $400–$1,200 per window | Best long-term energy savings | Old or failing windows, major renovation |
| Door replacement & threshold seals | $300–$2,000 | Improves security and thermal envelope | Worn doors, visible air leakage |
| Professional installation & flashing | $200–$800 | Prevents moisture, ensures warranty | Any replacement or major retrofit |
Implementing Passive Design Strategies
Passive design uses the building’s location, materials, and smart design to reduce the need for heaters and air conditioners. It combines solar gain, shading, thermal mass, and good airflow to help homes adjust to the local climate. By choosing passive design early, homeowners enjoy lower bills and nicer living spaces during building or green renovations.
Natural ventilation decreases air conditioning use by pulling in breezes and warm air. Properly placed windows and vents help create cross-ventilation and stack ventilation. These ideas lower the need for cooling and keep the air fresh, especially when used with filters or controlled systems.
- Cross-ventilation: align openings to prevailing breezes to sweep air through living spaces.
- Stack ventilation: use high and low openings to let warm air rise out and draw cool air in.
- Operable window sizing: match window area to room volume for effective airflow without drafts.
Benefits of Natural Ventilation
Natural ventilation uses less energy and makes indoor air healthier by bringing in fresh air. In many areas, it’s enough to cool homes for much of the year, reducing the need for traditional cooling systems. Combined with heat-recovery systems, it’s great for homes aiming for high energy efficiency.
Optimal Orientation and Layout
The right orientation and layout take full advantage of the sun in cold areas and reduce heat in warmer places. Putting living areas towards the sun in the Northern Hemisphere captures warmth and light. Service areas and garages on the north side help keep the house warm and act as a buffer.
Shading methods like overhangs, awnings, and certain trees protect homes from too much summer sun but let in winter sunlight. Materials like concrete, stone, or tile store heat during the day and release it at night. Adding clerestory windows, skylights, and light shelves reduces the need for artificial lighting.
| Design Element | Benefit | Retrofit Tip |
|---|---|---|
| Building orientation | Optimizes solar gain and daylighting | Adjust landscaping and add exterior shading to improve performance |
| Natural ventilation | Reduces cooling energy and freshens air | Install operable windows and interior vents; add trickle vents where needed |
| Thermal mass | Buffers temperature swings, lowers peak loads | Add tile or masonry floors in sunlit rooms or exposed interior walls |
| Shading strategies | Limits unwanted heat gain in summer | Fit adjustable overhangs or plant deciduous trees for seasonal control |
| Daylighting | Reduces artificial lighting; improves comfort | Use clerestories, light shelves, or skylights to bring light deeper inside |
Passive design strategies make HVAC systems smaller and cheaper to install. When we add smart systems to the mix, we get even better results in airtight houses. These ideas are not just for new homes. They also help with making eco-friendly updates during renovations, which is great for builders who care about the environment.
Financial Considerations for Low Energy Improvements
When thinking about making your home more energy-efficient, consider the upfront costs and the savings over time. Comparing the initial investment and long-term benefits is key. You can look at how much time it takes to get your money back. For example, adding insulation to your attic can start saving you money in 3 to 7 years. Smart thermostats pay off in 1 to 3 years. Solar panels take about 5 to 12 years to pay off, depending on local electricity prices and any available incentives.
Focus on upgrades that save the most energy and money first, like sealing leaks, adding more insulation, and switching to LED lights. There are several ways to finance these improvements. You can use a home equity loan, a loan specifically for energy efficiency, utility bill financing, or PACE programs if they’re available in your area. If your local government offers financing that’s tied to your property, you can find more details on programs like the Clean Energy Improvement Program.
Tax credits and rebates can make a big difference in the cost of making your home energy efficient. For example, the federal government offers a tax credit for installing solar panels that can shorten the time it takes to recoup your costs. Various rebates can lower your upfront costs for installing things like heat pumps, extra insulation, and appliances that save energy. Look out for sales and promotions from manufacturers to save more. Remember, you need to keep all your receipts and paperwork to qualify for these tax credits and rebates, and some programs might ask you to get approved first or do an energy audit.
When deciding what energy-saving changes to make, think about what’s technically possible, the savings you expect, the incentives available to you, and how you’ll pay for it all. Getting a home energy audit can help you figure out the best changes to make. Use resources from the DOE, ENERGY STAR, and local programs to make sure you’re making the right choices. They can help you understand the rules and how much you could save by making your home greener.