In the US, 40% of household water is used outdoors. But, a 55-gallon rain barrel can save a lot of that water during the growing season.
This guide is perfect for homeowners, gardeners, and DIYers in the US. It shows how to harvest rainwater to save water.
It covers everything from choosing a barrel to maintenance and dealing with issues. You’ll learn how to install, maintain, and use rain barrels effectively.
By following this guide, you can lower your water bills and help the environment. You’ll also find tips for drought resilience.
The main message is simple: Use this guide to install a rain barrel. Remember to check your local rules before starting.
Key Takeaways
- Rainwater harvesting supports eco-friendly water conservation and reduces landscape water use.
- This guide provides a step-by-step rain barrel setup for reliable garden irrigation.
- A properly installed rain barrel lowers water bills and eases stormwater runoff.
- Maintenance and winterization keep the system safe and efficient year-round.
- Consult local regulations to ensure compliant rain barrel installation.
What is a Rain Barrel and Why Use One?
A rain barrel is a container that catches water from your roof. It’s used for watering gardens, composting, and cleaning tools. These barrels can hold 40 to 80 gallons, while bigger ones store more for larger needs.
Definition and Purpose of Rain Barrels
Rain gets funneled from gutters to a barrel through a downspout. You can access the water with a hose, a can, or a pump. This system cuts down on using clean drinking water outside and helps save the environment.
Setting up a rain barrel is simple. They come with screens to keep bugs and leaves out. Cities and the EPA support using rain barrels to manage rainwater better.
Benefits for Your Garden and the Environment
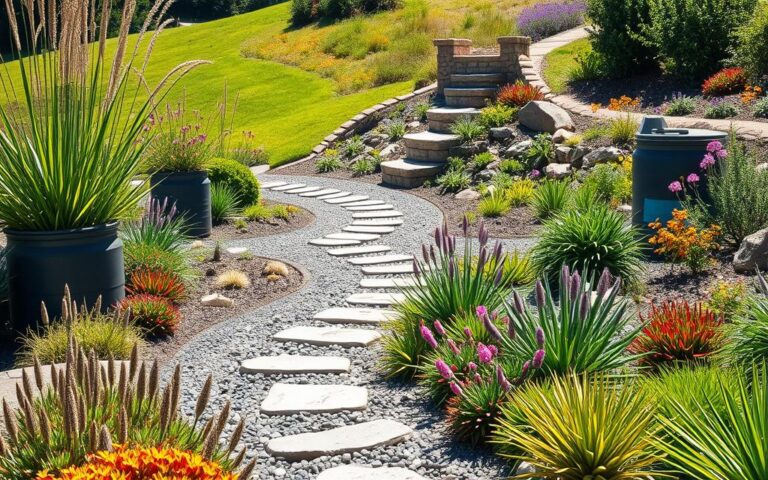
Rainwater is great for your garden because it’s soft and chlorine-free. It helps your plants during dry periods without needing much tap water.
Collecting rainwater helps your whole community too. It means less runoff and soil erosion. It also keeps local water cleaner and reduces the need for city water during dry spells. Using a rain barrel can lower your water bill and make your garden thrive.
Choosing the Right Rain Barrel
Choosing the right rain barrel is important. It should meet your garden’s needs, fit your budget, and look good. You’ll want to consider your roof size and required features before deciding. This will help ensure you’re happy with your barrel over time.
Different Types of Rain Barrels
Plastic barrels are lightweight and won’t break the bank. Brands like Good Ideas and Suncast make them UV-resistant to avoid damage from the sun. They’re a good pick for most people who need an easy setup.
Recycled barrels re-use large 55-gallon containers. You can find them at restaurants and stores. They’re cheaper and perfect for a DIY project, but you’ll need to clean them and cut holes carefully.
Decorative barrels make your yard look nicer. Brands like EarthMinded and Algreen offer them in resin or wood styles. If you need something temporary, go for a collapsible tank.
If you have a big garden, consider modular systems or cistern tanks. They can hold a lot more water for your plants.
Key Features to Consider
The size of the barrel should match your roof and local weather. Smaller homes might use 50–80 gallon barrels. But, larger areas might need bigger barrels or several connected together.
Look for barrels meant for outdoor use to make sure they last longer. Features like inlet screens will keep out leaves and reduce cleaning time.
Make sure the barrel has an overflow outlet to manage extra water. A good spigot height makes it easier to fill up cans. Go for durable materials like brass for fittings.
The base of the barrel should be stable and even. This helps with water flow and safety.
Recommended Brands and Models
Good Ideas offers kits for easy setup. Their RainStation has solid fittings. EarthMinded’s kits are also well-liked for their reliability.
Suncast focuses on making barrels that enhance your home’s outside look. Algreen gives you both style and durability in their products.
For those interested in making their own, try using 55-gallon food-grade drums. Home Depot and Lowe’s have all you need for a successful project.
| Type | Typical Capacity | Best For | Representative Brands |
|---|---|---|---|
| Plastic Molded | 40–80 gallons | Easy install, budget buyers | Good Ideas, Suncast |
| Food-Grade Drums | 55 gallons | DIY builders, large storage | Restaurant supply drums + custom fittings |
| Decorative Resin/Wood-Look | 45–70 gallons | Landscaped yards, curb appeal | EarthMinded, Algreen |
| Collapsible/Flexible | Varies | Temporary or portable needs | Specialty portable brands |
| Modular/Cistern | 100+ gallons | Large gardens, scalable systems | Modular system manufacturers |
Tools and Materials Needed for Installation
This section lists what you need to install a rain barrel easily. It’s useful if you’re following a guide or doing it yourself. This way, you’ll be ready and can avoid mistakes, making setup quicker.
Essential Tools for Setup
Remember to measure twice and cut once. You’ll need a tape measure, level, and a screwdriver set for layout and fastening. To attach spigots and make inlet holes, grab an adjustable wrench and a drill with a hole saw or spade bits.
To cut downspouts neatly, use a hacksaw or PVC cutter. A utility knife and durable work gloves are also important.
Required Materials and Supplies
Start with a rain barrel that suits your yard and gutters. Then, add a downspout diverter or elbow to lead water into the barrel. Choose a brass hose bib or spigot and Teflon tape for the threads to stop leaks.
Use silicone or plumber’s tape to seal joints. Deal with overflow by connecting a flexible hose or PVC, and keep out debris with a screen or mesh. Raise the barrel on a stable base like gravel, pavers, or concrete blocks for better water flow.
For higher water quality, consider adding an inline filter or first-flush diverter. Screens that keep out mosquitoes and locks to protect kids are smart adds for safety.
Safety Gear and Precautions
Safety glasses and gloves are must-haves for cutting metal downspouts and drilling. Wear long sleeves to guard your skin against fiberglass or metal barrels. These are the basics for safe rain barrel installation.
Make sure the base is even and secure to avoid tipping. If the barrel’s heavy, get help or use a dolly to move it. It’s crucial not to connect rainwater to drinking water systems. Stick to the rules for preventing contamination.
Always check your local rules before starting. Some places have specific requirements or restrictions. If unsure, contact your local building or health department to follow regulations.
| Item | Purpose | Recommended Example |
|---|---|---|
| Tape Measure, Level | Layout and ensure base is even | Stanley 25ft tape; Empire 48″ level |
| Drill with Hole Saw | Cut inlet and spigot holes cleanly | DeWalt 20V drill with 1.5″ hole saw |
| Adjustable Wrench, Screwdrivers | Tighten fittings and mounts | Crescent adjustable wrench; Wiha screwdriver set |
| Hacksaw / PVC Cutter | Trim downspout or PVC piping | Irwin Hacksaw; Ridgid PVC cutter |
| Brass Spigot & Teflon Tape | Durable water outlet with leak prevention | Gilmour brass spigot; 3/4″ Teflon tape |
| Screen / Mesh | Keep debris and insects out of barrel | Stainless steel mesh, 1/16″ openings |
| Base Materials | Provide stable, level elevation | Crushed gravel, concrete pavers, cinder blocks |
| Overflow Hose / PVC | Direct excess water away from foundation | 1″ flexible PVC hose or Schedule 40 PVC |
| Optional First-Flush Diverter | Improve initial water quality | RainReserve first-flush kit or DIY diverter |
| Personal Protective Equipment | Prevent injury during cutting and lifting | Safety glasses, work gloves, long sleeves |
Planning Your Rain Barrel Installation
Proper planning makes collecting rainwater simple and safe. Start by balancing your practical needs with your site’s limits. This will help you get the best from your rain barrel setup.
Avoiding leaks, overflow, and extra work later is easier with a few smart choices now.

Selecting the Ideal Location
Choose a spot near the downspout that gets steady rain runoff. This minimizes the need for extra piping and captures more rain for your garden. Put the barrel where it can easily water vegetable beds, flowers, or pots without hoses crossing paths.
Stay away from spots that flood or could send overflow towards your house. Ensure the overflow outlet sends water away from buildings and walkways. Choosing shaded areas can limit water warming, stopping algae and keeping water cleaner for use.
Think about easy maintenance access and winterizing. Your site should allow for straightforward cleaning, using the spigot, and access to any modifications needed.
Marking Space and Preparing the Site
Start by measuring your barrel’s footprint. Make sure there’s space for the spigot and raising the base. If you’re planning to link more than one barrel, plan the spots for connectors and valves now.
For a solid base, use crushed stone, pavers, or concrete. Raise the barrel on blocks or a stand 6-12 inches to help water flow. A higher stand means better water pressure but needs a firm foundation to avoid tipping.
Before you begin, clear any plants and debris from the area. Make sure the ground slopes away from your house to prevent flooding. And leave room to modify the downspout if you’re adding a diverter.
| Planning Step | Action | Why It Matters |
|---|---|---|
| Location choice | Place near active downspout and irrigation zones | Maximizes captured runoff and reduces hose runs |
| Elevation | Raise 6–12 inches on a solid base | Improves gravity-fed flow and pressure for watering |
| Sun exposure | Choose partial shade when possible | Limits algae growth and keeps water cooler |
| Overflow routing | Grade site and plan outlet direction | Prevents foundation damage and localized flooding |
| Multi-barrel planning | Map piping, connectors, and valves | Ensures smooth integration for expanded rainwater harvesting |
| Downspout access | Confirm clearance for cutter and diverter | Makes rain barrel installation guide steps easier to execute |
Step-by-Step Installation Process
This guide shows how to install a rain barrel safely and practically. It outlines each step clearly for homeowners to follow on their own. Before starting, read through the guide, get your tools ready, and check local rules.
Setting Up the Base for the Barrel
Pick a level spot near your downspout. First, make the soil even and firm. Then, add a layer of crushed stone or sand. Finally, use pavers or concrete blocks to make a sturdy platform that lifts the barrel off the ground.
The base must be strong enough to hold the barrel’s weight. Remember, water is heavy—about 8.34 pounds per gallon. A full 50-gallon barrel could weigh over 400 pounds. For higher spigot access, use a stand that can support this much weight.
Connecting the Downspout
Find where to cut the downspout for the water to go into the barrel. Use tin snips or a hacksaw to cut at that spot. Then, put in a diverter or elbow so water flows smoothly into the barrel without splashing out.
Add a screen to keep out leaves and bugs. You might also use a first-flush diverter. This device diverts the first dirty water away, keeping the stored rainwater clean. Make sure the rest of the downspout sends overflow water away when the barrel gets full.
Installing the Rain Barrel
Put the barrel on its base and make sure it’s level. Attach the spigot at the right height using Teflon tape for threads and silicone for seals. If it didn’t come with one, attach a screened inlet too.
Install an overflow pipe or hose to direct extra water away from your home’s foundation. Double-check all connections to prevent leaks. To join several barrels, follow the maker’s directions for pipes or hoses and add valves to control water flow between them.
Test your setup by mimicking rain and checking how the diverter and overflow work. Make any needed adjustments. Mark the system as “non-potable water” to remind everyone it’s not for drinking. Now, your rain barrel system is ready to collect and store rainwater efficiently.
Maintenance Tips for Rain Barrels
Good upkeep makes your rain harvesting system better and last longer. This guide outlines key tasks for routine care. It also covers how to keep away pests and protect your barrels during cold months. Follow these steps alongside a rain barrel installation guide for best results.
Regular Cleaning and Inspection
At least once a month during the rainy season, check your system. Look over screens, inlet filters, spigots, and overflow lines. Also, clear leaves and debris from gutters to prevent clogs.
Once a year, empty and clean the barrel inside with a soft brush and mild soap or just water. Use diluted vinegar to remove algae, then rinse well to safeguard your plants.
Look for leaks and replace any worn parts. Keep seals like rubber washers and gaskets in good shape to ensure everything works smoothly.
Preventing Mosquito Breeding
Use tight screens on inlets and overflows to block mosquitoes. Seal lids well and use screened vents to allow air in.
If water stands, keep it moving with a small solar pump or add mosquito dunks with Bti near open water.
Winterization Steps
In areas where it freezes, disconnect and empty barrels before freezing starts. Freezing can cause plastic barrels and fittings to crack. If you can, store barrels upside down and covered.
If your barrels are part of an irrigation system, isolate and drain them before winter. Take off spigots if suggested by the maker. Wrapping exposed parts can offer some protection.
Record-Keeping and Schedule
Record your inspections, cleanings, and repairs. A simple log helps you see patterns and extends your barrel’s life. Use this log to keep track of how well your system is doing after setup.
| Task | Frequency | Why It Matters |
|---|---|---|
| Inspect screens and gutters | Monthly (rainy season) | Prevents clogs and maintains water quality |
| Interior cleaning | Annually | Removes sediment and algae buildup |
| Replace washers/gaskets | As needed | Stops leaks and ensures reliable spigot use |
| Use Bti or pump | When standing water is present | Effective for preventing mosquito breeding |
| Drain and store for freeze | Before first freeze | Critical for winterizing rain barrels and avoiding damage |
Using Rainwater Efficiently in Your Garden
Collecting rainwater helps plants stay healthy and saves money. You can start simple with a rain barrel. This article will share tips on using stored rainwater well.
Watering Strategies for Different Plants
When it’s hot, vegetables and flowers need water almost every day. Water the soil directly to keep leaves dry and avoid diseases.
Shrubs and flowers that come back every year do best with less water. Give them 1–2 inches of water weekly to help roots grow deep.
Potted plants need water often but not too much at once. Fill a watering can from your rain barrel or use a small hose.
Young trees need water regularly to help their roots grow strong. Use your rain barrel to water them slowly and avoid too much moisture.
Water plants early in the morning or late in the day. This saves water and helps plants. Use your finger or a moisture sensor to check the soil first.
Irrigation Systems Compatible with Rain Barrels
Drip systems work great with rain barrels. They need the barrel to be a bit higher to flow well.
Soaker hoses are good if the barrel is raised a little. They keep water in the soil. This is great for plants.
Some pumps push water through sprinklers or hoses. The Wayne and Little Giant brands are good choices for this.
Timers and low power pumps can make watering automatic. Always prevent backflow and mark water as not for drinking when setting up your system.
- Mulch garden beds to hold moisture and cut evaporation losses.
- Match watering frequency to plant type and season to conserve stored water during droughts.
- Use soil sensors or manual checks to prevent overwatering and improve overall efficiency.
Troubleshooting Common Issues
This guide gives gardeners tips on fixing common rain harvesting system issues. It builds on the rain barrel installation steps. Also, it shares handy advice for daily use.

Addressing clogs and overflow problems
Blockages in gutters and downspouts often come from leaves, pine needles, and roof grit. A clogged screen or small overflow pipe can lead to water damage.
To avoid this, clean gutters and downspouts often. Make sure inlet screens are clear. Replace them if needed. A first-flush diverter also helps by keeping solids out of your barrel.
If water pools by your house, use a hose or PVC pipe to extend the outlet. This way, water can go to your garden instead of causing problems.
Dealing with contamination
Stuff like organic debris, bird droppings, and algae can dirty your water. Roof materials may also add harmful chemicals.
Keep your water cleaner by using screened inlets and cleaning regularly. For uses beyond watering plants, add filters. These can catch particles and clear up bad smells.
If you need even cleaner water, look into UV systems or chlorination. Don’t forget local health advice. If bad smells or algae stay, clean out the barrel. You might need to replace its liner or the whole tank.
Always label barrels as not safe for drinking. Also, use backflow prevention with pumps or hoses. This follows safety rules you’ll find in any good rain barrel guide.
This guide aims to simplify rain barrel maintenance. It helps ensure your harvested water is safe and beneficial for your garden.
Enhancing Your Rain Barrel System
Adding a few upgrades can make your rain barrel more useful for your garden. This guide will show you how to better store, deliver, and increase water capacity. These tips will help anyone following a basic rain barrel setup guide.
Adding Mulch and Drip Irrigation
Put 2–4 inches of organic mulch around your beds to reduce evaporation and keep roots cool. This means you won’t have to water as often, making your barrel last longer.
Mulch works well with drip irrigation for precise watering. Set up a drip system with a gravity line from your barrel, or use a small pump. Remember to add a pressure regulator and a filter to keep out sediment.
Drip systems let you water right at the root, avoiding waste. Using timers lets you water at the best times, saving water and boosting plant health.
Linking Multiple Rain Barrels Together
Connecting several rain barrels together gives you more water for dry times. Link them at the same height with a hose or PVC. This ensures even flow and full barrels.
Put shut-off valves between barrels for easy maintenance. Outfit the last barrel with an overflow hose to a drain or garden. Use check valves to keep water flowing the right way.
If you need a lot of water, think about a bigger system with a pump. Add smart controls like float valves and water level sensors for automation. Timers can control water use to match when your plants need it most.
Eco-Friendly Practices with Rain Barrels
Rain barrels are a simple step towards eco-friendly living and better gardens. They help us use less treated water and support the environment. Making small changes like this at home can also help the whole community.
Reducing Water Bills and Resource Conservation
Using a rain barrel can save hundreds of gallons of water each year. This means lower water bills and less pressure on city water systems. Cities like Seattle and Austin even encourage using rain barrels to help out.
Combining rainwater collection with smart gardening can save even more water. This not only saves money but also cuts down on the energy needed to treat and deliver water. It’s a smart way to help your budget and the planet.
Promoting Biodiversity in Your Garden
Rainwater is great for plants and can make them grow stronger. It also helps attract bees, butterflies, and other beneficial insects. Using rainwater means your garden can thrive without extra fertilizers.
If you direct extra water to a rain garden, it can support even more wildlife. Choosing plants that don’t need much water is another plus. This helps the environment and reduces your water use.
Workshops by local groups share how to collect and use rainwater effectively. They promote ways to manage water in neighborhoods and teach about living sustainably. Sharing these ideas can inspire others to try eco-friendly practices too.
Practical Tips for Long-Term Success
Keeping your rain barrel clean is important. Make sure to check and clean it regularly. This helps keep the water flowing and stops mosquitoes from breeding.
Connecting barrels or directing water to your garden can increase the benefits. Simple maintenance and smart gardening can lead to savings and a healthier environment.
Rain Barrel Regulations and Best Practices
This short guide helps readers navigate rules and smart steps for rain collection systems. It combines practical rain barrel installation advice with notes on local guidelines and environmental impacts.
Local guidelines and restrictions
In the United States, rules about rain barrels change by location. Many places offer rebates or incentives for using rain barrels through their water departments or state Cooperative Extension. There might be limits on how big your storage can be, the need for permits for big cisterns, or rules on connecting barrels to your gutters and irrigation systems.
Health departments usually say no to connecting barrels directly to drinking water without proper safety devices. Also, your homeowner’s association may have its own rules on how your barrels should look or where you can place them. It’s smart to look at your city’s building codes, stormwater management rules, and local water utility guidelines to get the specifics.
Environmental impact considerations
Using rain barrels helps lessen stormwater runoff, and this means fewer nutrients and pollutants get into our rivers and streams. This action reduces the demand for treated water and supports our goals to save more water. Adding things like rain gardens, permeable paving, or vegetated swales along with your barrel can boost these environmental benefits even further.
But, if not kept up well, rain barrels can attract mosquitoes or hold water that doesn’t move. Debris from your roof or old materials can also lead to water contamination, like with lead. Putting in first-flush diverters and making sure to label barrels as not safe for drinking are good ways to lower these risks and make sure people know how to use the collected water safely.
Best practices
- Follow a step-by-step rain barrel installation guide and check permits before starting.
- Use screened inlets, overflow outlets, and secure lids to prevent pests and debris.
- Perform routine maintenance: clean gutters, inspect spigots, and drain before freeze events.
- Integrate barrels with other green infrastructure to maximize environmental gains.
- Keep documentation of compliance with local guidelines for rain barrels and any required inspections.
Conclusion: Embracing Rainwater Harvesting
Rainwater harvesting saves water and helps gardens thrive. Using a rain barrel lowers bills and cuts stormwater runoff. It makes plants healthier and helps manage local stormwater.
Setting up a barrel is easy: pick the right barrel and place, create a stable base, and connect a downspout diverter with a screened inlet. Also, add a spigot and overflow pipe. It’s important to keep it maintained and ready for winter.
Make sure to follow local rules and keep your drinking water safe. Checking these things before you start is key.
For better results, use mulch, choose local plants, and try drip irrigation. Start with one barrel and grow your system as needed. This guide helps spur eco-friendly habits, support nature, and create a robust garden.
FAQ
What is a rain barrel and how does it work?
What are the main benefits of installing a rain barrel?
Which type of rain barrel should a homeowner choose?
What tools and materials are required for a DIY rain barrel installation?
Where is the best place to install a rain barrel?
How much weight does a full rain barrel add, and how should the base be built?
How does one connect a downspout to a rain barrel?
How should rain barrels be maintained to ensure longevity and water quality?
How can mosquito breeding be prevented in rain barrels?
Should rain barrels be winterized, and how is that done?
Can rainwater from a barrel be used inside the house?
How can a homeowner increase storage capacity beyond a single barrel?
What irrigation systems work well with rain barrels?
What common problems occur with rain barrels and how are they fixed?
Are there local regulations or permits required for rain barrels?
Which brands are recommended for reliability and availability?
How much water can a homeowner realistically save with a rain barrel?
Can rain barrels help support biodiversity and sustainable landscaping?
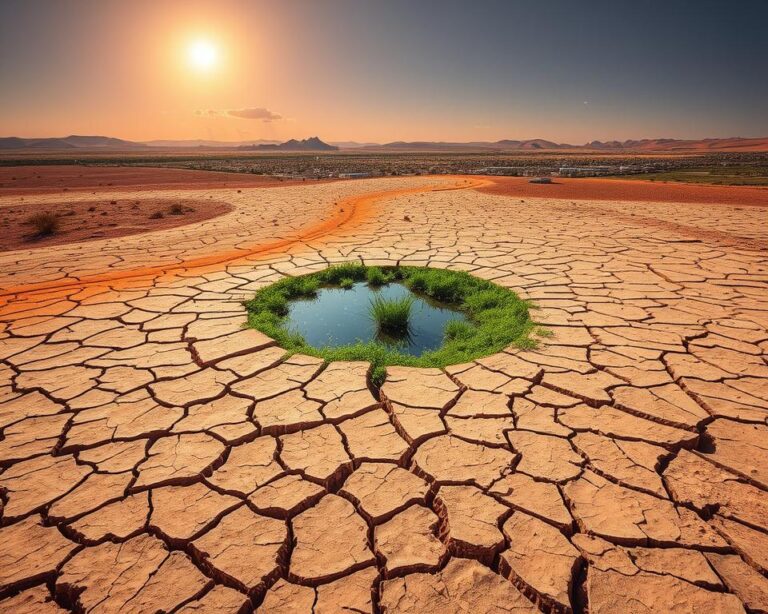
Field Scenario: High-Heat Week Water Strategy
In high-evaporation conditions, timing and flow rate matter more than total volume. Prioritize early-morning cycles, soil-moisture checks, and zone-based adjustments.
Implementation Checklist
- Measure baseline water usage for 7 days
- Adjust one variable at a time (timing, duration, frequency)
- Track plant stress signs before increasing volume
- Review results weekly and lock the best pattern
Common Errors
- Increasing water volume without checking runoff
- Ignoring soil type and absorption speed
- Using fixed schedules across weather changes
Quality Enhancement Update: 2026-03-05 — This article was refined with scenario-based guidance, implementation checklists, and measurable decision steps to increase practical value and reduce generic repetition.
Editorial Note: For policy and methodology, see Editorial Policy.
Article Trust & Methodology
Author: Rosalie Clark
Editorial Review Date: 2026-03-05
Purpose: Deliver practical, user-first guidance with clear limitations and realistic implementation steps.
How this article was prepared
- Topic intent mapping based on common reader problems
- Step-by-step structure with measurable checkpoints
- Risk notes and scenario-based adjustments
- Readability review for mobile and desktop
Who this article is for
This content is for everyday readers who need practical decisions they can apply safely and consistently, not theoretical advice only.
Sources and validation approach
Recommendations are organized around established best-practice principles (measurement, controlled testing, and periodic review). Readers should adapt guidance to local regulations, climate, infrastructure, and budget constraints.
For editorial standards and correction requests, see Editorial Policy and contact contact@everydaytechfinance.com.
Final Implementation Notes
For best outcomes, avoid changing multiple variables at once. Build a small decision log, review results weekly, and keep only changes that improve measurable outcomes over time. Consistency and clarity are more important than intensity.